Sweet Corn Pasta Salad with Lemon Basil Vinaigrette

It’s summer in a bowl. Seriously, though. This pasta salad has everything summery and delicious.

Fresh sweet corn? Check.

Vine-ripened cherry tomatoes? Check.

Herby arugula? Check.

Creamy avocado? CHECK!

And it’s all finished with a fresh lemon basil vinaigrette. It’s light, refreshing, and perfect for a picnic. 

In fact, the first time I made this pasta salad, I brought it to an outdoor movie night in DC. And it was a HIT! Perfectly portable and the ideal companion to an outdoor screening of Bend It Like Beckham. What more can you ask for? Apparently just more. My roommate asked for the pasta salad again the next week. And the next time I made it, we went to yet another outdoor movie night! I can confirm this pasta salad was equally delicious while watching The Parent Trap. It goes with everything!

What do you serve with sweet corn pasta salad? Great question! The answer is pretty much any main dish, but I especially like it with turkey burgers. I would also recommend making some pesto mayo for those turkey burgers and topping them with more arugula and avocado. Because why not? Also, I HATE throwing away food and serving this pasta salad with turkey burgers is a great way to use up any leftover avocado and arugula. 

A few tips for making this pasta salad…

Add a squeeze of lemon juice to the avocado before mixing it in with the rest of the ingredients. The lemon will help prevent the avocado from browning. However, the avo will most likely brown after a day in the fridge so this dish is best served the same day you make it!

I’d recommend waiting to add the arugula until right before you’re ready to serve. The longer the arugula sits in the salad, the more wilted it becomes.The freshest-tasting greens will be gently mixed with the salad and lightly coated with dressing. 

I generally like to add salt to taste at the very end to ensure I’m not over-salting or adding any unnecessary sodium to my diet. That being said, the pasta will most likely need a generous sprinkling of salt to bring out the other flavors in the dish.

So grab some sweet corn at the farmer’s market and make this dish while the freshest summer produce is still in season! Enjoy!


Ingredients:

  • 3 ears of sweet corn
  • 1 lb bow tie pasta
  • 1 cup olive oil
  • Zest and juice of one lemon
  • 2 cloves garlic
  • 1 green onion
  • Handful of fresh basil
  • 1 cup cherry tomatoes, halved
  • 3 avocados, diced
  • 2 heaping cups of arugula
  • Generous amount of salt, to taste

Instructions:

  1. Start by adding a little water to a large pot, just to coat the bottom. Place corn in a steamer basket in the pot and bring to a light boil. Steam the corn for about 10 minutes. Remove from heat and allow to cool.
  2. Cut the corn off the cob and set aside.
  3. Meanwhile, bring a large pot of salted water to a boil. Add the pasta and cook according to package directions.
  4. Drain the pasta and run under cold water. Once the pasta is completely cooled, add to a large mixing bowl.
  5. Make the vinaigrette: Add olive oil, lemon zest, lemon juice, garlic, green onion, and basil to a blender. Blend until all ingredients are incorporated and there are small flecks of basil throughout the mixture.
  6. Add the vinaigrette to the pasta and mix well. Add the corn and halved cherry tomatoes.
  7. Right before serving, add the avocado and arugula. Toss the pasta salad until everything is coated with the vinaigrette.
  8. Add salt to taste. Serve immediately and enjoy!

Healing Mango Coconut Baked Oatmeal Muffins

Hi there!

Long time no see, am I right?

It’s been a busy couple of weeks. I’ve been wedding planning, working 2 jobs, helping Noah move, and trying to reckon with everything happening in our country. Quite simply, it felt tone-deaf and insensitive to post anything on social media other than BLM content.

While I’ll still be posting plenty of resources and important content from the Black community, I figured it was time you had a little baked oatmeal in your life. And that’s where this recipe comes in!

I LOVE these baked oatmeal muffins. They’re the perfect healthy grab-and-go breakfast. When I was still working 9-5 in the office, I would take two of these for breakfast every morning. They’re full of good-for-you ingredients and perfectly filling. Lightly sweetened with honey, frozen mango, and a little shredded coconut, these oatmeal muffins are low in sugar and high in fiber. They also have a hint of turmeric and ginger which I promise you’ll barely taste! The turmeric turns the milk a beautiful golden color. Plus, turmeric and ginger have amazing anti-inflammatory benefits. Hence the “healing” in the recipe title!

Like I mentioned before, these muffins are great on their own. Grab a few, stick ’em in a container or a baggie, and head right out the door. They’re also amazing when warmed in the microwave and drizzled with a little extra honey. And if you’re a baked oatmeal purist, feel free to warm a few in a bowl and top with your choice of milk. The options are endless!

Just make them! Your tummy will thank you. And your busy mornings might just get a little brighter!


Ingredients:

  • 3 large eggs
  • 1.5 cups almond milk
  • 3/4 cup unsweetened applesauce
  • 1 tsp vanilla extract
  • 1 tsp ground cinnamon
  • 3.5 cups oats
  • 1 tbsp melted coconut oil
  • 1/4 tsp ginger
  • 1/4 tsp turmeric
  • 1/4 cup honey
  • 1 cup chopped frozen mango chunks
  • Shredded coconut for topping

Directions:

  1. Preheat oven to 350 degrees.
  2. Crack 3 eggs into a large bowl. Pour in almond milk and whisk to combine.
  3. Add vanilla extract, cinnamon, ginger, and turmeric. Stir well.
  4. Melt 1 tbsp of coconut oil and add to bowl. Add applesauce and mix well.
  5. Gradually add oats and coat with egg/milk/applesauce mixture.
  6. Chop frozen mango chunks into bite-sized pieces. Add mango chunks to the oat mixture and stir well.
  7. Spoon the oatmeal into a greased muffin pan. Top with shredded coconut.
  8. Bake for 20-25 minutes, or until the oatmeal muffins are set. A toothpick inserted into the center should come out clean, and the centers shouldn’t jiggle.
  9. Let cool and enjoy!

Gloria’s Favorite Chicken Pot Pie

This recipe comes with a story, but it’s a good one, so you’ll want to read until the end. A little while back, I hosted a Game of Thrones watch party with some friends in my tiny studio apartment. We had two kinds of popcorn, lemon bars, and plenty of wine. (My friends always bring more than enough wine. One of the many reasons I love them!)

Earlier that evening, I baked a chicken pot pie that Noah and I ate for dinner. I wanted the leftover pot pie to cool a little before I covered it in plastic wrap and stuck it in the fridge, so it was still sitting on top of my oven when my guests arrived. 

Needless to say, they noticed the pot pie immediately and wanted to try some! Long story short, my friends devoured that pot pie in record time and Noah was quite concerned he wouldn’t have enough for lunch the next day!

So when I was thinking of what to make for my next dinner party, there was only one option. And that option has a buttery, flaky crust with a creamy chicken and vegetable filling. Did I mention it’s super easy to make? You start with thawed frozen pie crust and whip up a simple filling made with butter, flour, chicken stock, and milk. Then add in your rotisserie chicken and frozen veggies and BAM! You’re ready to stick that sucker in the oven. 

It’s my Mom’s recipe and it’s never failed me. To this day, it’s my friend Gloria’s favorite. She went to a restaurant from my hometown that is famous for its chicken pot pie and guess what? She still thought mine was better. THAT’S how you know this recipe is pure gold!

I recommend you make this recipe immediately. Trust me, your friends and family will thank you. And they might just ask you to host more chicken pot pie parties. 


Gloria’s Favorite Chicken Pot Pie

Ingredients:

  • 1 (15 oz) package of 2 pie crusts
  • ⅓ cup butter
  • ⅓ cup chopped onion
  • ⅓ cup all-purpose flour
  • ½ tsp salt
  • ¼ tsp pepper
  • 1 ½ cups chicken broth
  • ⅔ cup milk
  • 3 cups shredded rotisserie chicken
  • 2 cups frozen mixed vegetables, thawed

Directions:

  1. Heat oven to 425 degrees. Press one pie crust into the bottom of a 9 inch pie plate.
  2. Melt butter in a saucepan over medium heat. Add onion and cook until tender. 
  3. Add flour, salt, and paper. Stir until blended.
  4. Gradually add in chicken broth and milk, stirring until thick and bubbly. 
  5. Stir in chicken and mixed vegetables. Remove from heat. 
  6. Spoon chicken mixture into the crust-lined pie plate. Top with second crust. Seal edges, making sure to tuck the bottom crust under the top crust. Cut a few slits in the top crust. 
  7. Bake for 30 to 40 minutes, or until the crust is golden brown. Let stand 5 minutes before serving.

Dark Chocolate Bundt Cake

Hands down, one of our best family recipes. You seriously can’t beat this one. Imagine the richest, darkest, most delicious chocolate cake. It’s so moist and chocolatey that you can taste the decadence. It has notes of coffee and just a little sea salt to intensify the chocolate flavor, plus lots and lots of cocoa powder. Top it off with a velvety chocolate ganache that simply melts in your mouth. Are you drooling yet?

But that’s not even the best part. What if I told you the cake is made in one bowl?

It’s true! This is the easiest one-bowl cake. It starts with a well-greased bundt pan. Does anyone else have trouble with cakes sticking to bundt pans? My mom has been plagued by bundt pans in the past. There’s something about the bundt pan that makes it prone to sticking. My guess is that all the ridges in the pan create plenty of opportunities for cake batter to stick. To set yourself up for success, I suggest using the trifecta of butter, cooking spray, and cocoa powder to prevent the cake from sticking. First, rub a stick of butter all over the inside of the pan, taking extra care to butter the ridges and grooves. Next, spray a light coat of cooking spray over the butter. I find that cooking spray helps to coat the little spaces where the butter won’t stay. Instead of sprinkling the pan with flour, lightly dust the inside with cocoa powder. Flour helps prevent the cake from sticking, but it leaves behind white residue. Cocoa powder helps guard against sticking and leaves the cake looking pretty!

To make the cake, combine your dry ingredients in a large bowl and mix well. Make a well in the center of the bowl by “digging a hole” in the dry mixture. Then pour in your wet ingredients and give it a quick stir to get everything incorporated. Grab a hand mixer and beat for a few minutes to add some air into the batter. This will create a light, fluffy cake texture. Bake at 350 degrees for about 45 minutes and voila! You just made a super simple and delicious dessert.

While this cake is delicious on its own, adding a rich chocolate ganache really takes it to another level. Plus, ganache is much simpler to make than frosting. It’s ready in minutes! Bring 1/2 cup of heavy cream to a simmer and then add about 3/4 cup chocolate chips to the pot. Whisk continuously until the chocolate is fully melted and silky smooth. THAT’S IT! Just pour that chocolatey goodness over the cake and get ready to indulge!

I paired this cake with some blackberries and a little whipped cream for my family. This combo adds a light, fruity element to all that dark chocolate. But the possibilities are endless! Serve with a scoop of vanilla ice cream! Enjoy alongside a piping hot cup of coffee! Skip the ganache and make a raspberry sauce to drizzle on top! Pair the cake with a glass of red wine!

So many great options, right?! But one thing isn’t optional: You really should make this cake. It’s the perfect quarantine cure.

Dark Chocolate Bundt Cake

Ingredients:

For the cake:

  • 2 cups sugar
  • 2 cups flour
  • 1 cup cocoa
  • 2 tsp baking soda
  • 1 tsp baking powder
  • A pinch of salt
  • 1 cup strong coffee
  • 1 cup of milk
  • 1/2 cup vegetable oil
  • 2 eggs

For the ganche:

  • 1/2 cup heavy cream
  • 3/4 cup chocolate chips

Directions:

  1. Preheat oven to 350 degrees.
  2. Prepare the bundt pan: Rub a stick of butter along the inside of the pan, paying extra attention to the grooves and ridges. Spray with a light coat of cooking spray. Finish by lightly dusting with cocoa powder.
  3. Brew a cup of strong coffee. You can use a brewed cup from a coffee maker or good quality instant coffee. If using instant coffee, I suggest using 2 tsp of instant coffee granules for one cup of hot water. Make it extra strong!
  4. Allow the coffee to completely cool. Speed up the process by placing the hot coffee in the refrigerator or freezer for a few minutes.
  5. While the coffee is cooling, combine sugar, flour, cocoa, baking soda, and baking powder in a large bowl. Mix well.
  6. Make a well in the dry ingredients by “digging a hole” in the center of the bowl. Pour the coffee, milk, and vegetable oil into the well. Crack the eggs into the bowl.
  7. Stir the liquid and dry ingredients together until just combined.
  8. Beat for 2 minutes.
  9. Pour the batter into the greased bundt pan. Bake for about 45 minutes, or until a tookpick inserted in the center comes out clean.
  10. Allow cake to cool completely. Remove from pan.
  11. Make the ganache: Bring the heavy cream to a simmer in a small saucepan. Remove the pan from the heat. Add chocolate chips to the pan, whisking continuously until the chocolate is melted.
  12. Allow the ganache to cool slightly before pouring over the cake. Stick the cake in the refrigerator for about 30 minutes to allow the ganache to set up before serving.

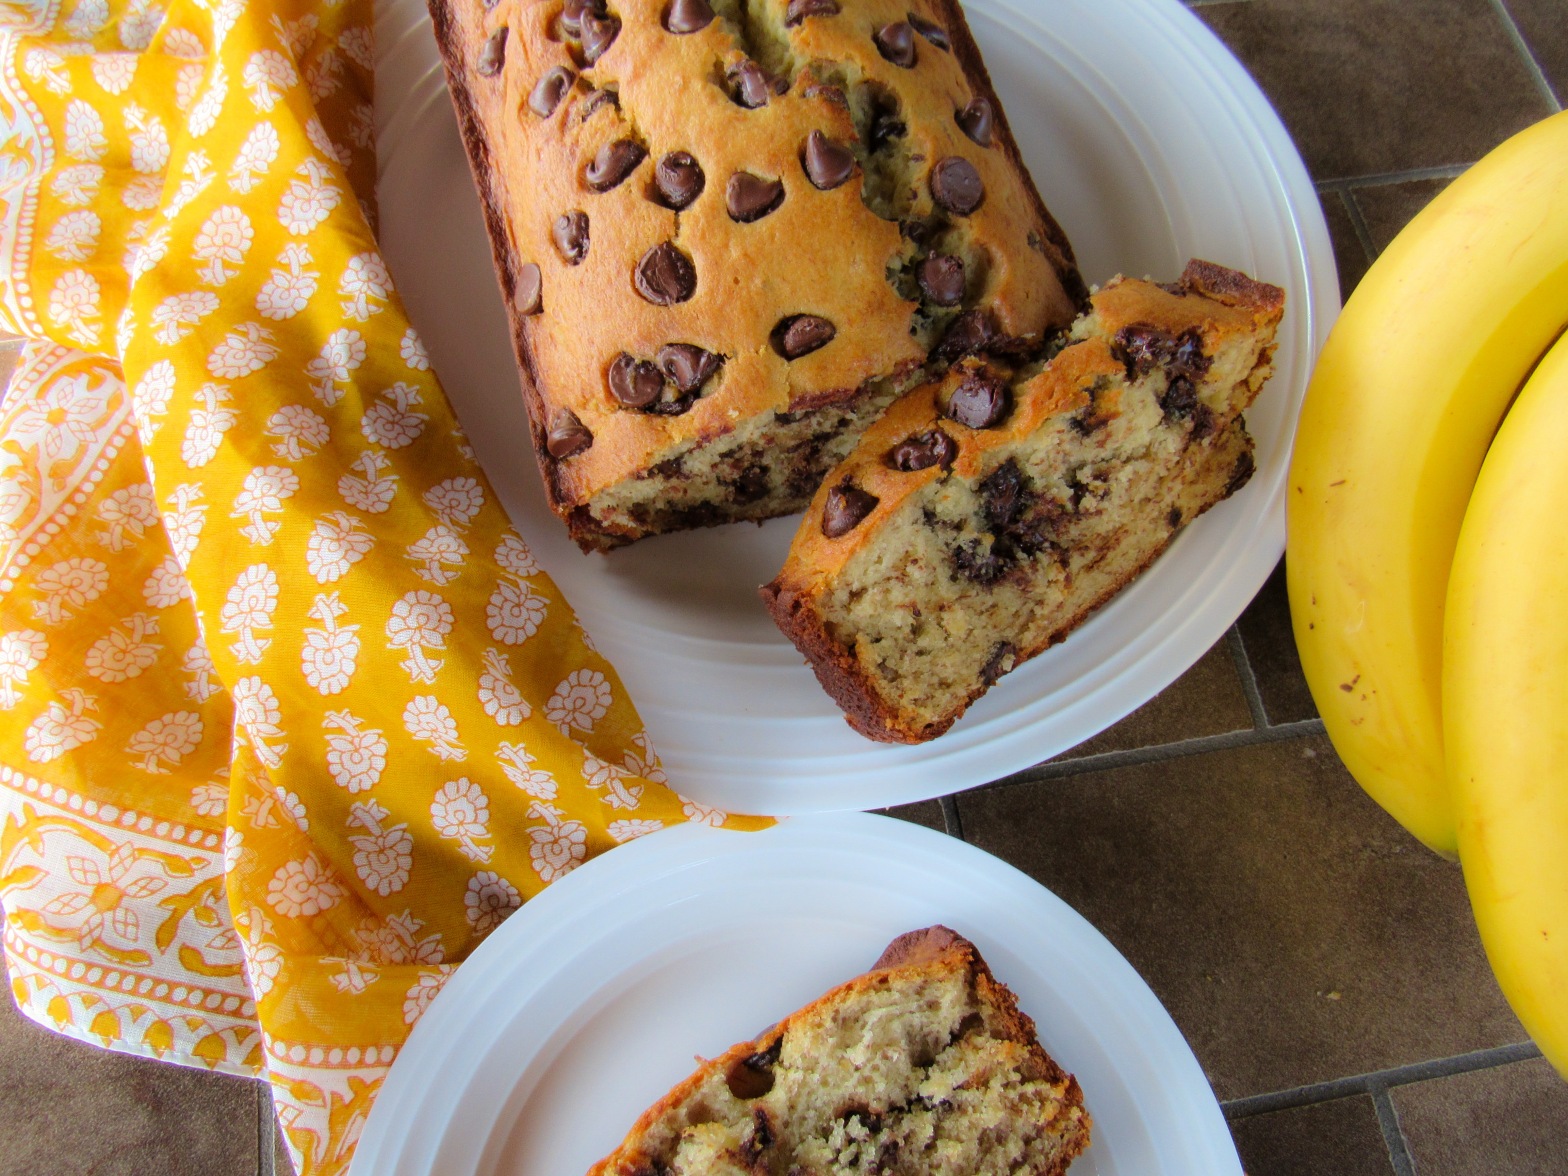
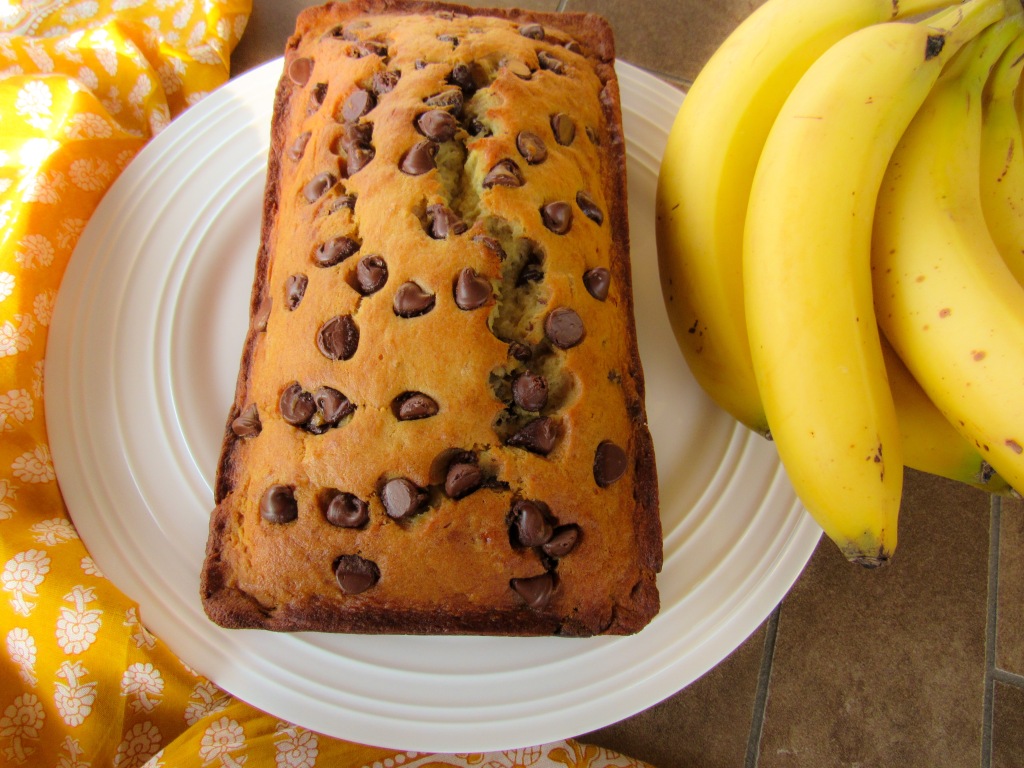
Mom’s Banana Bread

You simply cannot go wrong with banana bread. Especially if it’s your mom’s recipe! Actually, it’s my mom’s mom’s recipe. You know it’s a good old-fashioned recipe when one of the original ingredients is shortening. My mom always made it with butter instead, but you can bet my grandmother made it with some old-school shortening!

My mom also tweaked the recipe by adding extra banana. She probably had a few too many bananas on hand and figured it couldn’t hurt. Not a bad idea! This recipe is actually a great way to use up brown, spotted bananas before they spoil. No worries if they don’t look pretty. They’ll bake up to be something pretty delicious!

When I got my hands on the recipe, I added some chocolate chips. Everything is better with chocolate, right?! But I will admit, this banana bread doesn’t need any additions. It’s simply delicious on its own! Sometimes the simplest recipes are also the best ones!

This banana bread starts with a simple dry ingredient mixture of flour, baking powder, baking soda, and salt. Then just whip up some butter, sugar, eggs and beat ’em good. Mash some bananas and slowly begin to incorporate them into the butter/sugar/egg mixture, alternating with the dry ingredient mixture. Toss in some chocolate chips and pour that batter into a well-greased bread pan. Bake for about an hour (trust me, it’s worth the wait!) and cool.

If you ask me, banana bread is best served warm and fresh from the oven with a little bit of butter. It’s delicious for breakfast with a smear of peanut butter and a cup of coffee. And it’s amazing for dessert with a little Nutella and a cup of tea.

So if you’re going a little stir crazy, why not bake a banana bread to pass the time? You won’t regret it. And a little piece of banana bread in the morning just might make your day a little brighter!


Mom’s Banana Bread

Ingredients:

  • 1 ¾ cup flour
  • 2 tsp baking powder
  • ¼ tsp baking soda
  • ½ tsp salt
  • ⅓ cup butter, softened
  • ⅔ cup sugar
  • 2 eggs
  • 2 cups mashed bananas (about 3-4 whole bananas)
  • Handful of chocolate chips

Directions

  1. Preheat oven to 350 degrees. 
  2. In a medium bowl, combine flour, baking powder, baking soda, and salt. Stir and set aside. 
  3. In a large bowl, cream softened butter using a hand mixture. Gradually add sugar while continuing to beat until light and fluffy.
  4. Add eggs to the butter and sugar mixture. Beat well.
  5. Add flour mixture to the butter/sugar/eggs, alternating with mashed bananas. Add a small amount of the dry ingredients/mashed bananas at a time, beating after each addition until smooth. 
  6. Pour batter into a well-greased bread pan. 
  7. Bake for 1 hour or until done. The bread is done when it is golden brown and a toothpick inserted into the center comes out clean.

Baked Ranch Chicken Tenders with Honey Mustard Sauce

I have a confession to make. This recipe was not made on Amanda’s Tiny Table.

Instead, it was made in Karen’s Kitchen!

In case you don’t know me personally, Karen is my mom. With all of the COVID-19 craziness going on, I decided to leave Washington, D.C. and seek refuge at my parents’ house in Lancaster, PA. So instead of cooking for one in a tiny kitchen, I’ve been cooking for three while surrounded by ample counter space and a full-size refrigerator. It’s been a silver lining amidst these gray skies of uncertainty.

Have you been having trouble finding certain food items in the stores? It’s been extremely difficult to find any kind of chicken or turkey here. But thankfully, chicken tenders were still available the other day when my mom and I stopped at the grocery store. Chicken tenders are a great option since they’re a lean protein that’s generally cheap and family-friendly.

With everyone stuck at home practicing social distancing, I figured it was the perfect time for a quick, easy dinner idea. Even if you hate cooking, I promise you can make these chicken tenders. It’s super simple and comes together in less than 20 minutes. Plus, it’s kid and adult-approved! Just serve with some crispy roasted potatoes and a green salad and you’ve got a healthy dinner that’s perfect for the whole family.

If you’re a total cooking novice, chicken tenders are a great place to start. You’d be surprised how many chicken recipes you can make that begin with the same simple breading. First, dredge the chicken in flour, then dip in an egg wash mixture. To finish, coat in a simple crumb mixture. I’ve experimented with regular breadcrumbs, pretzel pieces, crushed buttery crackers, and panko. In this recipe, I use panko breadcrumbs and ranch seasoning for a zesty, crunchy coating.

While your tenders are baking, whip up a simple honey mustard sauce that’ll take this recipe to the next level. Seriously. When I made this for Noah, he wanted to just eat this sauce with a spoon. The sauce starts with two kinds of mustard and honey. Then we jazz things up with a little smoked paprika and garlic powder. It couldn’t be simpler or more delicious!

So next time you head to the store, grab a pack or two of chicken tenders and stock up on some pantry staples like mustard, honey, and panko breadcrumbs! You’ll have a tasty dinner in no time at all!


Ingredients:

For the chicken tenders:

  • 1 lb chicken tenders
  • 1/2 cup flour
  • 2 eggs, whisked
  • Splash of milk
  • 1/2 cup panko breadcrumbs
  • 1/2 packet ranch seasoning

For the honey mustard:

  • 2 tbsp dijon mustard
  • 2 tbsp spicy brown mustard
  • 2 tbsp honey
  • 1/2 tsp garlic powder
  • 1/2 tsp smoked paprika
  • 1/2 tsp salt
  • 1/4 tsp pepper

Directions:

  1. Prepare three shallow bowls (or pie plates!) for dipping and coating the chicken. In the first bowl, place 1/2 cup flour and set aside. In the second bowl, crack two eggs and whisk until combined. Add a splash of milk and mix well. In the third bowl, add the breadcrumbs and ranch seasoning. Mix until combined and set aside.
  2. Line up your bowls so that flour comes first, followed by egg and breadcrumbs. Start by dredging the chicken in flour. When the chicken is fully coated, dip in the egg mixture. Be sure to allow the egg to fully drip off the chicken before rolling in the breadcrumbs. Place on a baking sheet lined with non-stick foil.
  3. Repeat the above process until all of the chicken tenders are coated. Bake for 15-18 minutes, or until golden brown and cooked through.
  4. While the chicken tenders are baking, make the sauce. In a small bowl, combine all ingredients and stir well.
  5. Serve the chicken tenders with the honey mustard sauce. Enjoy!

Thai Yellow Curry

Have you ever seen that show on Food Network called Semi-Homemade Cooking with Sandra Lee? My personal favorite Food Network show will forever be the Barefoot Contessa with Ina Garten (She’s a GW alum!), but my mom and I would occasionally watch Sandra Lee. While Ina’s aesthetic was beautifully decorated tablescapes and afternoon picnics, Sandra was a little more approachable. She frequently used things like boxed cake mix or refrigerated biscuit dough in her recipes. She didn’t make everything from scratch, but her food always looked super tasty! Using store-bought ingredients to get a meal on the table in under 30 minutes? There’s absolutely nothing wrong with that!

Today’s recipe embraces Sandra’s semi-homemade mantra by combining store-bought thai yellow curry sauce with fresh ingredients to make a delicious, fool-proof dish. It’s amazing how a few additional ingredients can really enhance the flavor of a store-bought sauce! Coconut milk, lime juice, ginger, and garlic make this thai yellow curry velvety smooth and full of flavor. The recipe starts with a base of diced yellow onion, grated ginger, and crushed garlic sauteed in a little coconut oil. I like to use coconut oil to enhance the coconut flavor of the dish, but olive oil works too!

After the onions, garlic, and ginger are fragrant, sear the chicken on medium heat in the same pot. Make sure to get some nice golden brown coloring on both sides, but don’t worry about cooking the chicken all the way through. It will finish cooking in the sauce until its fork-tender. Speaking of sauce, add two bottles of thai yellow curry sauce to the pot. I used Trader Joe’s brand, but you can use whatever you have available! You can also make a homemade thai yellow curry sauce or paste if you’re really feeling adventurous! Some stores will also carry thai yellow curry paste near the red or green curry paste, but it’s generally hard to find.

Next, add one can of coconut milk and throw in some diced potatoes and cauliflower. Many thai yellow curry dishes include potatoes, but I like to add cauliflower for an extra veggie boost! You could also add whatever vegetables you like. Just be sure to choose veggies that cook at the same speed as the potatoes so nothing gets mushy!

Top off the pot with a little chicken broth and let everything simmer for a good 20 minutes. Enjoy the sweet smell of curry in the kitchen. This stuff will make your entire apartment smell AMAZING! After 20 minutes, check to ensure the potatoes are fork-tender. Remove the chicken from the pot and shred. This is one of my favorite ways to cook chicken breasts because they stay super moist and delicious! Add the chicken back to the pot and stir all that goodness together.

Last but not least, spoon the curry over generous servings of steamy jasmine rice or enjoy on its own. Top it off with some freshly chopped cilantro and you’ve got yourself a delicious, healthy, colorful meal in under 30 minutes!

Ingredients:

  • 3 tbsp coconut oil, divided
  • 1/2 yellow onion
  • 3 cloves garlic
  • 1 tbsp grated ginger
  • 1 1/2 lbs chicken breasts
  • 2 bottles (11 oz) Thai Yellow Curry sauce
  • 1 can (13.5 oz) coconut milk
  • 3 cups peeled and diced gold potatoes
  • 1 1/2 cups chopped cauliflower
  • 1 cup low-sodium chicken broth
  • Juice of one lime
  • Cilantro (optional)

Directions:

  1. Heat 1 tbsp of coconut oil in a large pot. Add diced onion and saute until the onions are fragrant and translucent.
  2. Add crushed garlic and grated ginger. Heat until fragrant, about 2 minutes.
  3. Add chicken breasts and sear on both sides. Don’t worry about cooking the chicken through— it will finish cooking in the sauce.
  4. Pour in both bottles of yellow curry sauce and the can of coconut milk.
  5. Add the diced potatoes and cauliflower.
  6. Top with chicken broth and bring to a simmer. The liquid should just cover the potatoes, cauliflower, and chicken.
  7. Simmer for about 20 minutes, stirring occasionally.
  8. Squeeze lime juice into the pot and serve. Top with cilantro and additional lime wedges.

Orange Fig Scones

The recipe that started it all! I am proud to say that I’m known around the office as our designed scone baker. I brought some to work for my coworkers to try, and it was love at first bite. 

My Mom and I have always loved scones. They’re the perfect breakfast, snack, or dessert! But apparently this is an unpopular opinion. You see, most people would choose a muffin, chocolate croissant, or pretty much any other pastry over a scone. Scones have a bad reputation for being dry, crumbly, unflavorful bricks. And this seriously upsets me because good scones are nothing like that! They are soft and moist and cakey and sweet and delicious! 

So how do you make these mythical scones that somehow avoid the typical pitfalls? You start with this incredible recipe my Mom and I discovered a little while ago. It’s the perfect base for whatever flavored scones you’d like. The recipe has all the usual characters— flour, sugar, baking powder, baking soda— but adds sour cream to keep everything soft and moist. The real secret is the frozen butter grated into the dough. This keeps the butter super cold so the scones puff up as they bake. And the little bits of buttery goodness throughout the dough gives them a rich flavor and fluffy texture. 

My favorite part about this recipe is that it’s easily customizable! Stir in whatever dried fruit you’re feeling and you’ve got a delicious new flavor combination! Some of my personal favorites include lemon blueberry, cherry almond, and mango apricot. But you can feel free to experiment with all kinds of fruits and nuts. And I won’t tell if you slip in a few chocolate chips!

Now let’s talk toppings. You’ve got options! For one delicious variety, you can brush the tops of the scones with egg wash and sprinkle them with coarse sugar crystals. It’s super simple and the sugar adds a nice little crunch to the top of the scone. Another option is to leave them plain and whip up a sweet little glaze to drizzle, pipe, or spread on top. Another fabulous choice! And if you’re feeling REALLY fancy, you can add some chopped nuts or sprinkles on top of that glaze!

As if this whole thing could get any better, you could also make a batch of homemade lemon, lime, or orange curd to spread on top. These scones are sprinkled with sugar and topped with a generous spoonful of orange curd or fig preserves. Now THAT’S a breakfast of champions. 

In my humble opinion, scones are best served with a giant mug of coffee or a dainty cup of tea. But you can enjoy them any way you’d like. Just be sure to make them and love them. The scone does not deserve its bad reputation!

Ingredients:

  • 2 cups all-purpose flour
  • 1/3 cup sugar
  • 1 tsp baking powder
  • 1/4 tsp baking soda
  • 1/2 tsp salt
  • 8 tbsp salted butter, frozen
  • 1/2 cup chopped dried figs
  • 1 tsp orange zest
  • 1/2 cup sour cream
  • 1 large egg

Directions:

  1. Preheat oven to 400 degrees.
  2. In a large bowl, mix together flour, sugar, baking powder, baking soda, and salt. Stir to combine.
  3. Using a cheese grater, grate the frozen stick of butter. Add the butter to the flour mixture and stir until the butter forms small, pea-sized pieces.
  4. Add chopped figs and orange zest.
  5. In a liquid measuring cup, whisk together sour cream and a beaten egg
  6. Gently fold the liquid mixture into the dry ingredients. Use your hands to mix the dough until it forms a ball. The dough will seem dry and crumbly at first, but will come together with a little elbow grease!
  7. If the dough is no longer cold to the touch, refrigerate for a few minutes.
  8. Place the dough onto a lightly-floured surface. Press the dough into a circle that is about 1/2 inch thick.
  9. Make 4 cuts to form 8 triangles. Place scones on a cookie sheet lined with parchment paper.
  10. Brush the scones with a simple egg wash made of one beaten egg white and a dash of milk. Sprinkle with coarse turbinado cane sugar.
  11. Bake until golden, about 15 to 17 minutes.

Recipe adapted from https://www.allrecipes.com/recipe/79470/simple-scones/

Amanda’s Tiny Table

Welcome to Amanda’s Tiny Table! I’m so glad you’re here!

After much deliberation, I decided to launch this blog in order to document and share some of my favorite recipes. Here at Amanda’s Tiny Table, you’ll find quick, easy, and (mostly) healthy recipes to serve your friends and family. Some are old family recipes, others are new recipes I’ve created or tweaked. But you can rest assured, all of the recipes you’ll find here are delicious and cost-effective!

This blog was inspired by two kinds of home cooks: the one who LOVES to be in the kitchen, and the one who HATES it! I am 100% the first type and my boyfriend, Noah, is wholeheartedly the second type! As someone who genuinely enjoys cooking, I love trying new recipes with interesting ingredients or baking elaborate desserts. But as someone who gets impossibly frustrated in the kitchen, Noah searches for the quickest and easiest meals to get him through the week.

His checklist goes like this:

Takes more than 20 minutes to make? Not happening.

More than 5 ingredients? No way.

Expensive items on the shopping list? Thank you, NEXT!

Some of the recipes on Amanda’s Tiny Table will be total “Amanda” recipes with interesting flavor combinations and unique ingredients. But others will be “Noah” recipes! Those are the ones with lots of pantry staples that you can throw together in 15 minutes. They’re awesome recipes to have in your back pocket for stressful days or when it’s 6:30 pm and you have no idea what’s for dinner.

So whether you’re an “Amanda” or a “Noah,” I think you’ll find something to love here at Amanda’s Tiny Table! Stay tuned for some fabulous recipes by subscribing with your email address below!

Much love,

Amanda

Design a site like this with WordPress.com
Get started